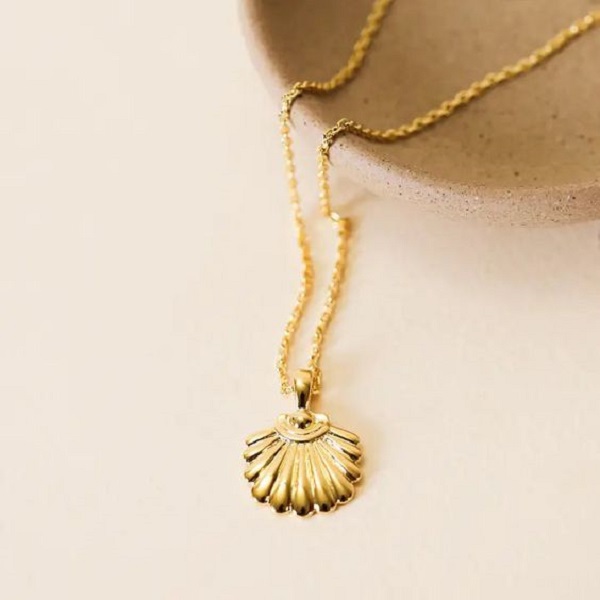
Introduction to Seashell Necklace Crafting
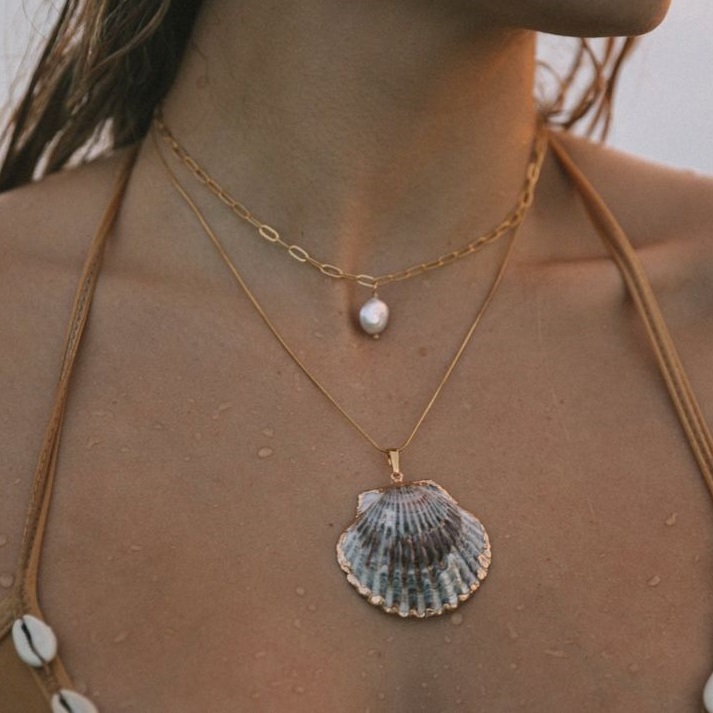
Seashell necklaces are timeless symbols of the sea and its treasures. These charming pieces of jewelry capture the essence of beach memories and have seen a surge in popularity as a crafty DIY project. Whether you’re aiming to craft a piece of casual summer wear or a unique gift, making your own seashell necklace can be a fulfilling and creative endeavor.Learn how to create a beautiful necklace
Seashell necklace crafting can be a relaxing activity to enjoy on your own or with friends and family. It’s more than just creating a fashion accessory; it’s about expressing your individuality and connecting with nature. Made with shells collected from beach trips, these necklaces serve as personalized keepsakes.
To embark on this craft project, you need a set of materials and a basic understanding of jewelry-making techniques. From choosing the perfect shells to adding clasps and beads, there are several steps to ensure your seashell necklace is both beautiful and durable.
In this guide, we’ll walk through the essential materials you need to get started, step-by-step instructions for assembly, tips to add texture and color, and finally, how to secure and finish your handcrafted necklace. Remember, patience and creativity are key. So, let’s dive in to create a seashell necklace that’s as unique as you are!
Essential Materials Needed for a Seashell Necklace
To start crafting your bespoke seashell necklace, assembling the right materials is crucial. Here’s what you’ll need to begin:
- Seashells: Pick a variety of small to medium-sized shells. Ensure they have holes or consider drilling them with care.
- Jewelry Wire: Opt for a 22 or 24 gauge wire, which is sturdy yet easy to manipulate.
- Necklace String: You can choose from cotton twine, fishing line, or a thin chain, based on your style preference.
- Clasps and Closures: A lobster claw closure is a popular choice for its secure locking mechanism.
- Beads: Select wooden, glass, or any decorative beads to complement your seashells.
- Pliers and Cutters: These tools are essential for cutting wire and handling small pieces.
- Glue or Epoxy: To attach items that can’t be strung or to reinforce the structure of your necklace.
- Paints or Dyes: If you wish to color your shells, water-based paints work well.
- Sealant: Such as a clear polish or varnish to protect your necklace from wear and tear.
With these materials, you have the foundation for a beautiful, handcrafted seashell necklace. Remember to gather each item before you begin crafting to ensure a smooth and enjoyable process.
Step-by-Step Process for Making a Seashell Necklace
Creating a seashell necklace involves a few clear steps. Follow this guide, and soon you’ll have your unique piece of jewelry ready to wear or gift.
- Prepare the Shells: Begin by carefully selecting small to medium-sized seashells. If they don’t have natural holes, you may need to drill them cautiously.
- Cut the Wire: Use pliers to cut a length of 22 or 24 gauge jewelry wire. The wire should be long enough to hold your shells and beads, plus a little extra for handling.
- String Your Materials: Start sliding shells and beads onto the wire. Alternate between them for an eye-catching pattern.
- Add Color (Optional): Paint shells with water-based paints if desired. Let them dry before continuing.
- Apply Glue or Epoxy: Some shells may need extra fixing. Use a small dab of glue or epoxy to secure them in place on the wire.
- Secure a Clasp: Fix a lobster claw closure at one end of the wire using pliers. This will keep your necklace from slipping off.
- Finish the Stringing: Continue adding shells and beads until you reach the desired length. Make sure the necklace sits comfortably.
- Close the Loop: Once all beads and shells are on the wire, loop the other end to secure your final pieces. Trim any excess wire.
- Apply Sealant: Lastly, apply a clear sealant to protect your necklace from damage and give it a polished look.
Each step brings you closer to completing your one-of-a-kind seashell necklace. This project calls for precision, patience, and a touch of creativity – perfect for crafters of all levels!
Adding Texture and Color to Your Seashell Necklace
When creating a seashell necklace, adding texture and color can take it from simple to stunning. This process allows you to inject your personal style and creativity into each piece.
Here’s how you can add that extra flair:
- Incorporate Glass Glitter: For added sparkle, press glass glitter into the clay of your pendant. Glass glitter is heavier and gives a more sophisticated look than regular glitter.
- Use Chalk Pastels: Pastel shavings bring a subtle, rich color to your creation. Gently scrape shavings off and press them onto the clay before sealing. This technique lends an artisan touch.
- Experiment with Paints: Whether it’s water-based or craft acrylics, painting your shells can transform their appearance. Mix colors for custom hues, and let them dry before assembly.
- Add Beads: Choose beads that match or contrast with your shells. String them onto your necklace to create patterns or focal points.
- Play with Stringing Materials: Swap out a simple twine for a thin chain to dress up your necklace, or use colorful threads for a fun, casual look.
Remember, while you’re adding these elements, the balance between color and texture is key. Too much can overwhelm the natural beauty of the shells. A good rule of thumb is to start simple and add gradually until you hit the right aesthetic for you.

Tips for Stringing Your Seashell Necklace
Making a seashell necklace requires careful stringing to ensure a beautiful and secure design. Here are some tips to guide you through this crucial part of the process:
- Order and Symmetry: Decide on a pattern for your shells and beads before stringing. This will give your necklace a balanced and harmonious look. Lay out your design and adjust as needed.
- String Strength: Choose a strong string material that can hold the weight of your shells. Cotton twine is good for a rustic look, while fishing line or a thin chain offer durability for heavier shells.
- Spacing: Use knotting or smaller beads between larger ones to keep them from rubbing together. This adds visual interest and protects your shells.
- Threading Technique: If using wire, bend a small hook at the end to keep beads from slipping off while you work.
- Shell Preparation: Ensure your shells have smooth holes to prevent string damage. If you drill holes, sand any rough edges.
Following these tips will help create a sturdy and stylish seashell necklace that you’ll be proud to wear or give as a gift. Happy crafting!
Securing the Necklace with Proper Closure Techniques
When crafting your seashell necklace, the closure is a critical component that should not be overlooked. It’s vital for both the necklace’s functionality and appearance. A well-secured closure ensures that your creation stays in place while it adorns your neck. Here are a few steps and tips to help you secure your seashell necklace with proper closure techniques:
- Choose the Right Clasp: Lobster claw clasps are popular due to their secure locking mechanism.
- Fixing the Clasp: Use your pliers to attach the clasp to the end of your wire or string. Ensure it’s tightly secured.
- Creating a Loop: At the opposite end, fashion a loop that the clasp can latch onto easily. The loop size should match the clasp.
- Adding Jump Rings: They can serve as connectors between your clasp and necklace string, adding extra security.
- Testing the Closure: Fasten and unfasten the clasp to confirm it’s secure and easy to use.
- Reinforcing With Knots: If using string, tie off the ends with a sturdy knot before adding a clasp to prevent unraveling.
By following these straightforward techniques, you’ll create a reliable and stylish necklace sure to last through wear and display your handpicked seashells beautifully. Never underestimate the importance of a good closure; it’s the finishing touch that keeps your handcrafted jewelry intact.
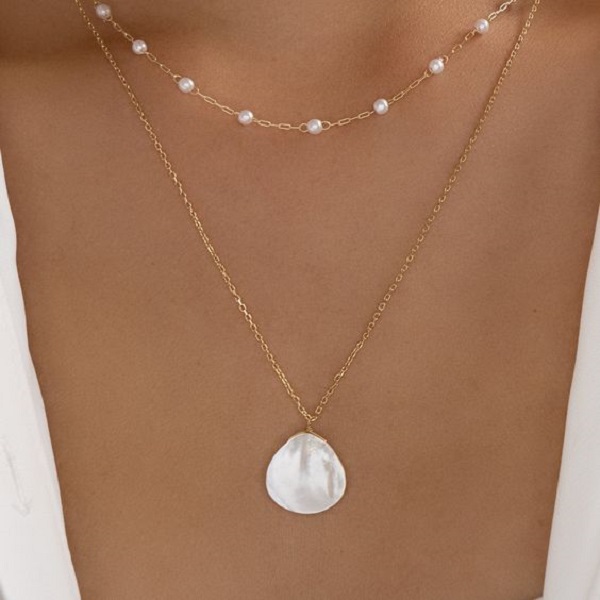
Customizing Your Seashell Necklace Design
When it comes to customizing your seashell necklace, the possibilities are limitless. Here’s how you can make your necklace truly unique:
Select Unique Shells
Choose shells of various shapes, sizes, and colors to reflect your personal style.
Arrange in Interesting Patterns
Lay out your shells before stringing to plan a captivating design.
Mix In Colored Beads
Incorporate beads that compliment or contrast your shells for extra flair.
Vary the Texture
Add materials like glass glitter or fibers for a diverse tactile experience.
By giving attention to these details, your handcrafted seashell necklace will not only be stunning but also a reflection of your creativity and individuality.