Introduction
Making a brooch is a delightful and rewarding craft that can be enjoyed by anyone, regardless of their skill level. Whether you’re looking to create a unique accessory for yourself or a thoughtful gift for a friend, this guide will walk you through the process of how to make a brooch. With just a few basic materials and some simple techniques, you’ll be able to design and create a beautiful, personalized brooch in no time. Let’s dive into the world of brooch making and explore the easy steps to get started.
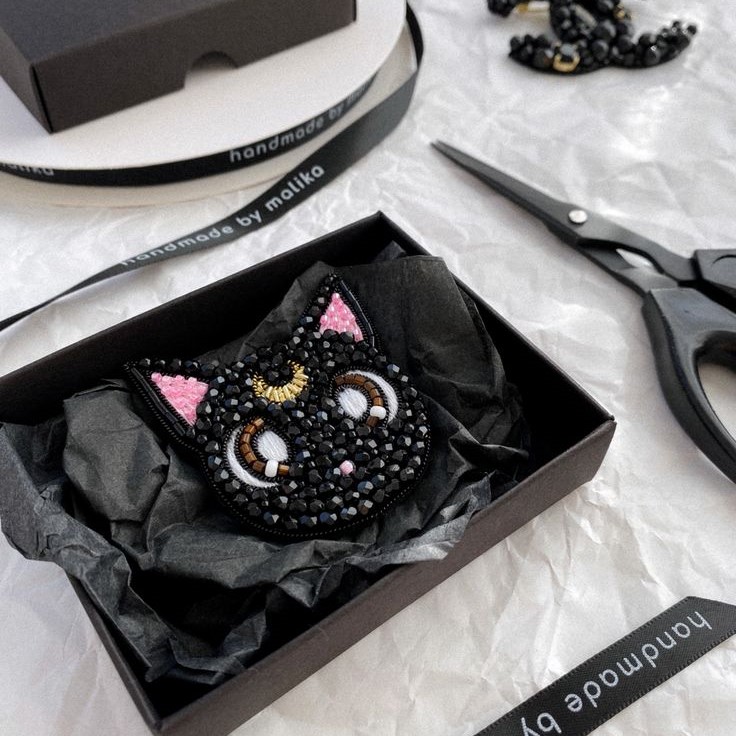
Gathering Your Supplies
Before you embark on your creative journey to how to make a brooch, it’s essential to gather all the necessary supplies. This preparation will not only streamline your crafting process but also ensure that you have an enjoyable and stress-free experience. Here’s a detailed breakdown of what you need:
Base Material:
Choose a base material that suits the style and durability you desire for your brooch. Common options include:
Felt: Soft, easy to cut, and available in a variety of colors.
Fabric: Offers a wide range of textures and patterns, allowing for more personalized designs.
Leather: Provides a sturdy and sophisticated look, ideal for a more elegant or rustic brooch.
Embellishments:
The embellishments are where you can let your creativity shine. Consider using:
Beads: Available in various sizes, shapes, and colors, beads can add a touch of sparkle and texture.
Sequins: Perfect for adding a bit of glitz and glamour, sequins come in different shapes and finishes.
Buttons: These can be vintage, modern, or even hand-painted, adding a unique and personal touch.
Other Decorative Elements: Feel free to incorporate other items like lace, ribbons, or even small charms to make your brooch truly one-of-a-kind.
Brooch Pin:
A brooch pin is the mechanism that allows your creation to be attached to clothing or accessories. You can find these at most craft stores, and they come in various styles, such as:
Sew-on Pins: These require stitching to attach to the back of your brooch.
Glue-on Pins: These are designed to be adhered with a strong adhesive, making them easier to use for beginners.
Adhesive:
A strong adhesive is crucial for ensuring that all elements of your brooch stay securely in place. Options include:
Fabric Glue: Specifically designed for fabric, this glue dries clear and is flexible, making it perfect for felt and fabric bases.
Hot Glue Gun: Provides a quick and strong bond, especially useful for attaching heavier embellishments like beads and buttons. Be sure to use it carefully to avoid burns.
Scissors:
A good pair of scissors is essential for cutting your base material and any additional decorative elements. Look for scissors that are sharp and comfortable to handle, as this will make your cutting tasks much easier and more precise.
Choosing Your Design
When it comes to designing your brooch, the possibilities are truly endless. Here’s a step-by-step guide to help you through the process:
Let Your Creativity Flow:
Begin by allowing your imagination to run wild. Think about what inspires you and what you would love to see as a finished piece. This could be anything from nature, art, or even a favorite book or movie.
Explore Different Styles:
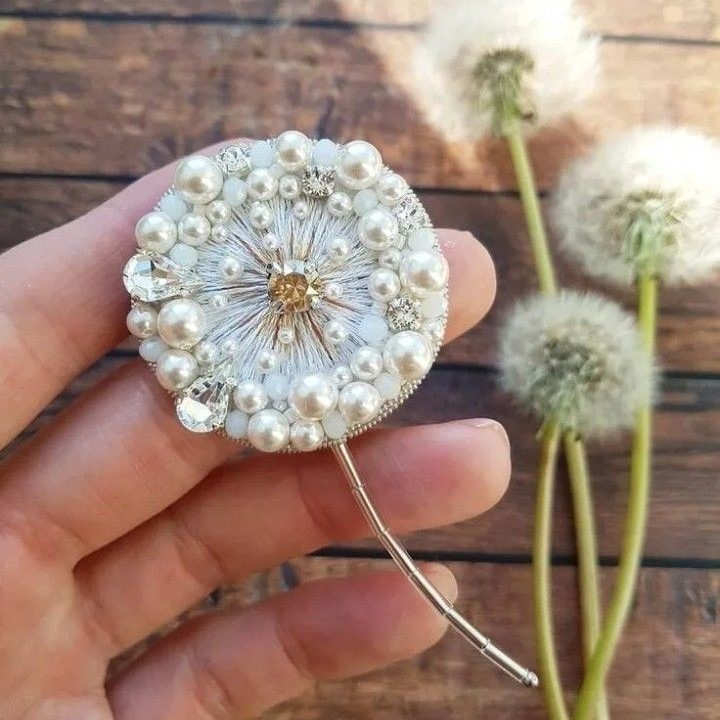
Classic Floral Design: If you appreciate timeless elegance, a floral design can be a beautiful choice. Consider different types of flowers, such as roses, daisies, or lilies, and how they might look in a brooch.
Geometric Shapes: For a more modern and sleek look, geometric shapes like triangles, squares, or circles can create a striking and contemporary design.
Whimsical Characters: If you want something unique and playful, consider incorporating whimsical characters or motifs, such as animals, mythical creatures, or cartoon figures.
Consider the Occasion:
Formal Events: For formal occasions, such as weddings or business events, a more elegant and understated design is often appropriate. Think about using materials like pearls, crystals, or delicate metals to create a sophisticated look.
Casual Wear: For everyday or casual wear, you can opt for something fun and colorful. Bright colors, bold patterns, and playful designs can add a touch of personality to any outfit.
Think About the Wearer:
Consider the person who will be wearing the brooch. What are their style preferences? Do they prefer classic, modern, or eclectic designs? Tailoring the design to the wearer’s taste will make the brooch more meaningful and enjoyable to wear.
Sketch Your Design:
Before you start cutting and gluing, take some time to sketch out your design on paper. This will help you visualize the final product and make any necessary adjustments. Pay attention to the proportions, details, and overall balance of the design.
You can also use this sketch to experiment with different color combinations and materials. This will give you a better idea of how the brooch will look when it’s complete.
Gather Materials:
Once you have a clear idea of your design, gather the materials you will need. This might include beads, fabric, wire, glue, and any other decorative elements. Make sure you have all the tools you need, such as scissors, pliers, and a needle and thread.
Prototype and Refine:
Create a prototype of your design, even if it’s just a rough version. This will allow you to see how the design works in practice and make any necessary refinements. Don’t be afraid to make changes and try new things until you are satisfied with the result.
By following these steps, you can create a unique and personalized brooch that perfectly suits the occasion and the person who will wear it.
Cutting and Shaping
Once you have your design, it’s time to cut and shape your base material. Lay out your chosen fabric or felt and carefully trace your design onto it using a pencil or fabric marker. Then, cut along the lines with a sharp pair of scissors, ensuring clean and precise edges. If your design includes multiple layers, repeat this process for each layer. You can use different colors or textures to add depth and interest to your brooch. Take your time during this step, as neat and well-cut pieces will result in a more professional-looking finished product.
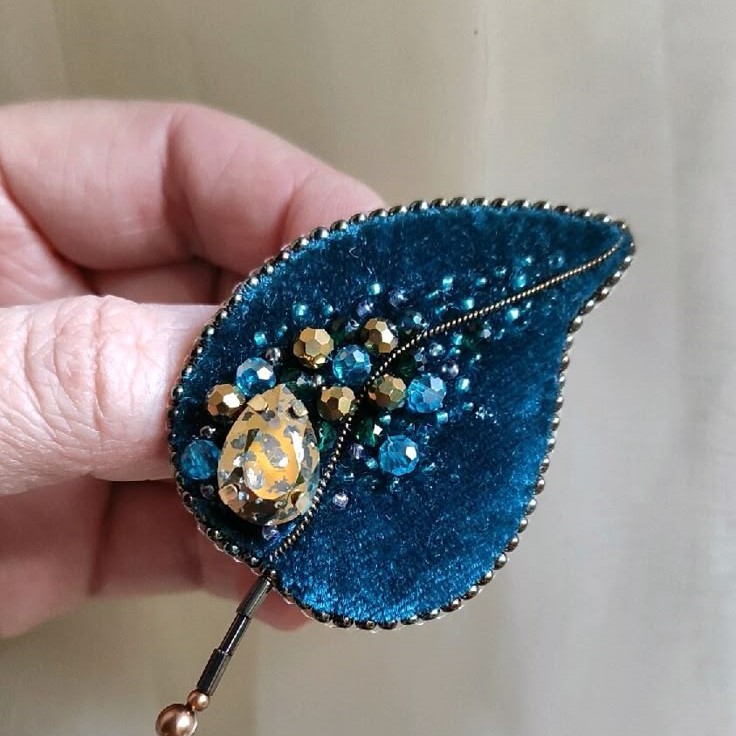
Adding Embellishments
Now comes the fun part—adding embellishments to your brooch. This is where you can really personalize your creation. Start by arranging your beads, sequins, or other decorations on the base material. Experiment with different placements until you find a layout you love. Once you’re satisfied, use your adhesive to secure the embellishments in place. If you’re using a hot glue gun, be careful not to burn yourself. Allow the glue to dry completely before moving on to the next step. The embellishments will bring your design to life and give it a unique touch.
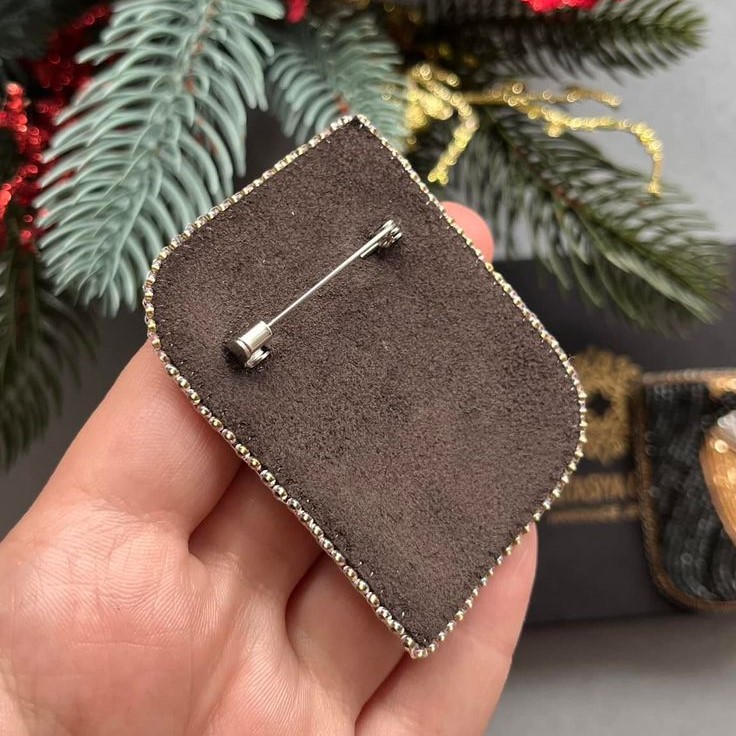
Attaching the Brooch Pin
With your design complete and the embellishments in place, it’s time to move on to the next step: attaching the brooch pin. Firstly, turn your brooch over to the back side. Next, apply a generous amount of strong adhesive to the back of the brooch pin. Then, carefully press the pin onto the center of the back of the brooch, ensuring it is securely attached. After that, hold it in place for a few seconds to allow the glue to set. If you’re using a fabric glue, you may need to wait a bit longer for it to dry. Finally, a properly attached brooch pin is crucial for the functionality of your accessory.
Finishing Touches
How to make a brooch? To give your brooch a polished look, you can add a few finishing touches. Trim any excess threads or glue, and make sure all the edges are neat. If you want to add an extra layer of protection, you can apply a clear sealant to the front of the brooch. This will help keep the embellishments in place and protect them from wear and tear. Finally, take a moment to admire your handiwork. You’ve created a beautiful, one-of-a-kind brooch that you can wear with pride or give as a thoughtful gift.
Conclusion
Creating a brooch is a wonderful way to express your creativity and make a unique accessory. By following these easy steps, you can learn how to make a brooch that is both stylish and personal. From gathering your supplies to adding the final touches, each step is designed to help you achieve a beautiful result. Whether you’re a beginner or an experienced crafter, making a brooch is a rewarding project that can be enjoyed by all. So, why not try it out and see what amazing designs you can come up with? Happy crafting!