Want to express your individuality without the commitment of permanent ink? Temporary tattoos offer a fantastic way to experiment with designs, try out placement, or simply add a touch of fun to your look. How to make fake tattoos? Whether you’re heading to a festival, a costume party, or just want to spice up your everyday style, DIY temporary tattoos are a creative and affordable option.
Why Go DIY?
DIY temporary tattoos offer several advantages:
- Cost-Effective: Save money by making your own designs instead of buying pre-made tattoos.
- Customizable: Create unique designs that reflect your personality and interests.
- Safe & Non-Toxic: Use materials that are safe for your skin and won’t cause irritation.
- Easy to Remove: When you’re ready for a change, simply wash them off with soap and water.
Materials You’ll Need
How to make fake tattoos? Gather these simple supplies to start your DIY tattoo adventure:
- Design: You can draw your own or find inspiration online.
- Transfer Paper: This special paper allows you to transfer your design to your skin.
- Scissors: For cutting out your design.
- Baby Powder: Helps set the tattoo and make it last longer.
- Hairspray: Acts as a sealant for your tattoo.
- Water: To wet the transfer paper.
- Optional: Colored pencils, markers, or eyeliner for adding color to your design.
Crafting Your Temporary Tattoo: Step-by-Step Guide
How to make fake tattoos? Let’s get crafty! Follow these simple steps to create your own temporary tattoo:
- Design: Draw or print your design onto the transfer paper. Remember to reverse the image if it includes words.
- Cut it Out: Carefully cut out your design with scissors.
- Clean Your Skin: Wash the area where you’ll apply the tattoo with soap and water.
- Apply: Place the design face down on your skin and dampen the back of the transfer paper with a wet cloth.
- Press & Peel: Press firmly for about 30 seconds, then slowly peel off the paper.
- Set & Seal: Dust with baby powder, then spray with hairspray to set the design and make it last longer.
Pro Tips:
- Test it Out: Before applying to your skin, test the transfer paper on a different surface to ensure it works properly.
- Clean Lines: For sharp lines and intricate details, use a fine-tipped pen or marker.
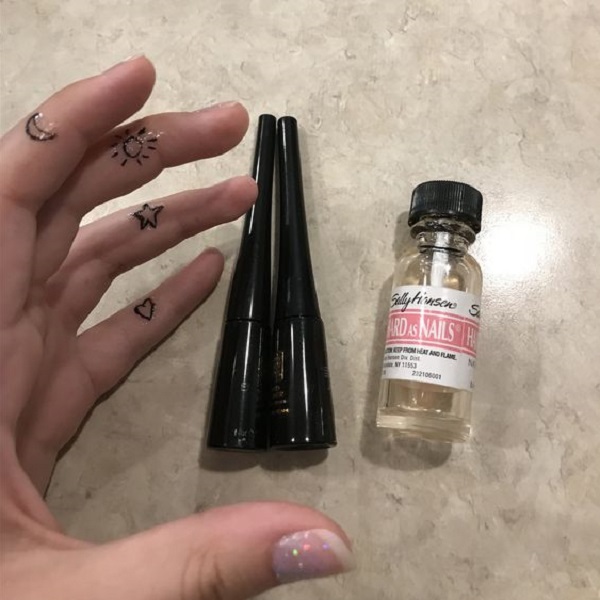
- Color Options: Add color to your design with colored pencils, markers, or even liquid eyeliner.
- Placement: Consider where you want to place your tattoo and how visible you want it to be.

Creative Ideas for DIY Tattoos
Feeling inspired? Here are some creative ideas for your DIY tattoos:
- Quotes & Sayings: Express yourself with your favorite inspirational quotes or lyrics.
- Symbols & Icons: Choose meaningful symbols, like hearts, stars, or animals.
- Minimalist Designs: Simple lines and geometric shapes create a chic and understated look.
- Tribal Patterns: Bold, intricate patterns inspired by different cultures.
- Personalized Designs: Create a unique tattoo that represents your passions, hobbies, or interests.
Safety First: Skin-Friendly Tips
Before you start inking yourself, here are a few safety tips:
- Patch Test: Always do a patch test on a small area of skin before applying a full tattoo.
- Sensitive Skin: If you have sensitive skin, opt for hypoallergenic materials and avoid harsh chemicals.
- Avoid Open Wounds: Don’t apply tattoos to open wounds or irritated skin.
- Remove Before Bed: Wash off your temporary tattoo before going to sleep to prevent potential irritation.
Remember, even temporary tattoos can have a powerful impact on others. Be mindful of cultural appropriation and avoid designs that could be offensive.
Beyond the Basics: Advanced DIY Tattoo Techniques
Once you’ve mastered the basics of creating temporary tattoos, you can explore more advanced techniques to take your creations to the next level.
If you’re not confident in your freehand drawing skills, stencils can be a lifesaver. You can find pre-made stencils in various designs, or create your own using adhesive vinyl or even cardboard. Simply place the stencil on your skin and fill it in with your desired color using a brush, sponge, or even a cotton swab.
Layering for Depth and Dimension
Want to create a more realistic-looking tattoo? Try layering different colors and textures to add depth and dimension to your design. Start with a base color, then add shading, highlights, and details using different shades and techniques. You can even experiment with mixing different types of inks and paints for a truly unique effect.
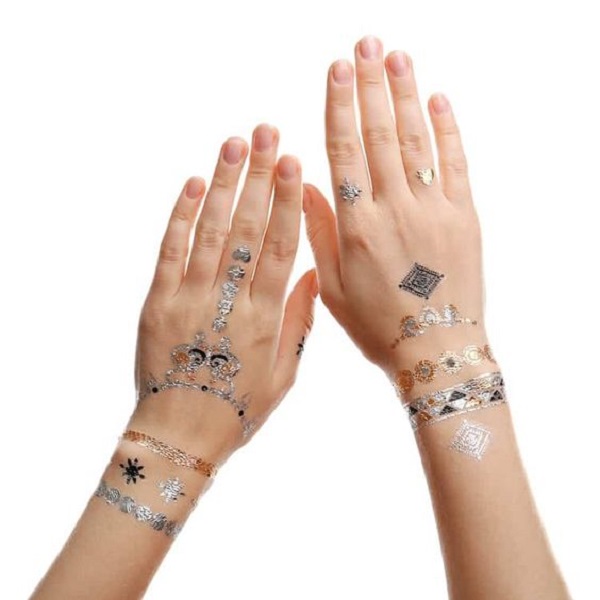
For a touch of sparkle and shine, incorporate glitter or metallic accents into your tattoo design. You can use loose glitter, glitter glue, or even metallic markers to add a touch of glam to your temporary ink.

Setting the Stage: Tips for Applying Your Tattoo
How to make fake tattoos? Applying your temporary tattoo correctly is just as important as creating a beautiful design. Here are a few tips to ensure your tattoo looks its best:
- Choose the Right Location: Consider the visibility and size of your design when choosing a location for your tattoo. Areas like the arms, legs, or shoulders are popular choices, but you can also get creative with placement on your back, chest, or even your face.
- Prepare Your Skin: Make sure your skin is clean, dry, and free of any lotions or oils. This will help the tattoo adhere better and last longer.
- Follow the Instructions: Each type of transfer paper or tattoo kit may have slightly different instructions. Be sure to read and follow the instructions carefully for best results.
- Seal It Up: Once your tattoo is applied, seal it with a layer of baby powder and hairspray to enhance its longevity.
Caring for Your Temporary Tattoo
To maximize the lifespan of your DIY tattoo, follow these simple care tips:
- Avoid Rubbing: Don’t rub or scratch the tattooed area, as this can cause the design to fade or peel.
- Limit Water Exposure: While temporary tattoos are water-resistant, excessive exposure to water can shorten their lifespan. Avoid soaking in baths or pools for extended periods.
- Gentle Cleansing: When washing the tattooed area, use a mild soap and lukewarm water. Avoid harsh scrubbing or exfoliating.
- Moisturize: Keep the tattooed area moisturized to prevent dryness and peeling.
DIY temporary tattoos are a fun and creative way to express yourself, experiment with different styles, and add a personal touch to your look. Whether you’re a seasoned artist or a first-time tattoo enthusiast, the possibilities are endless. So, grab your supplies, unleash your imagination, and start inking your own unique creations!
The Power of Imagination: Tattoo Designs for Every Occasion
How to make fake tattoos? Your DIY temporary tattoos can be as simple or elaborate as you like. Let your imagination run wild and create designs that express your unique personality and style.
Festive Fun
For holidays and special events, create themed tattoos that match the occasion. Think spooky spiders and ghosts for Halloween, hearts and flowers for Valentine’s Day, or festive ornaments for Christmas.
Fan Flair
Show your love for your favorite band, sports team, or TV show with a custom tattoo featuring their logo or characters. This is a great way to connect with fellow fans and show off your fandom.
Matching Tattoos
Create matching temporary tattoos for you and your friends or partner. This is a fun way to bond and commemorate special moments or inside jokes.
Temporary tattoos have come a long way since the simple decals of our childhood. With new techniques, materials, and endless design possibilities, they’re no longer just for kids. Whether you’re a trendsetter, a creative spirit, or simply looking for a fun way to express yourself, DIY temporary tattoos offer a world of possibilities. So, go ahead and embrace this exciting trend, and let your imagination run wild!