Summer’s here, and that means it’s time to shield yourself from those glorious rays. While store-bought hats are aplenty, there’s something undeniably special about crafting your own. How to make your own summer hat? Not only do you get a unique accessory, but you also infuse your personal style into a functional piece. Plus, it’s a fun and rewarding project!
Gathering Your Supplies: The Essentials
Before diving in, gather your tools and materials. You’ll need:
- Fabric: Choose a lightweight, breathable fabric like cotton, linen, or straw. Opt for fun patterns or bright colors to capture the summer vibe.
- Pattern: You can find free patterns online or in sewing books, or even create your own if you’re feeling adventurous.
- Measuring Tape: Accurate measurements are key for a well-fitting hat.
- Scissors: Sharp fabric scissors will make cutting your fabric a breeze.
- Sewing Machine (Optional): While hand-stitching is possible, a sewing machine will speed up the process.
- Thread: Choose a color that complements your fabric.
- Pins: These will help hold your fabric in place while sewing.
- Needle: If you’re hand-stitching, choose a needle appropriate for your fabric.
- Embellishments (Optional): Ribbons, flowers, buttons – let your creativity run wild!
Crafting Your Creation: Step-by-Step Guide
- Measure Your Head: Measure the circumference of your head where the hat will sit. This will determine the size of your pattern.
- Choose Your Pattern: Select a pattern that suits your style and skill level. Popular options include bucket hats, sun hats, and visors.
- Cut Your Fabric: Follow your pattern and carefully cut out the fabric pieces. Double-check your measurements to ensure accuracy.
- Sew the Pieces Together: Follow the instructions in your pattern to sew the pieces together. If you’re hand-stitching, use a backstitch for a strong seam.
- Add the Brim: If your hat has a brim, sew it to the crown. You can use interfacing to add stiffness and structure.
- Finishing Touches: Hem the edges of your hat, and add any desired embellishments. This is where you can truly personalize your creation!
- Try It On: Put on your hat and admire your handiwork! Make any necessary adjustments for a perfect fit.
Hat Styles to Inspire You
The possibilities are endless when it comes to hat styles. Here are a few ideas to get you started:
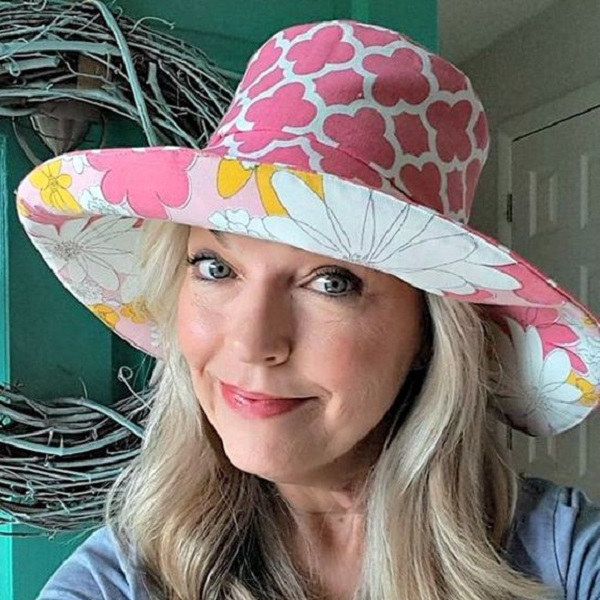
Floppy Sun Hat
Perfect for a day at the beach or a garden party.
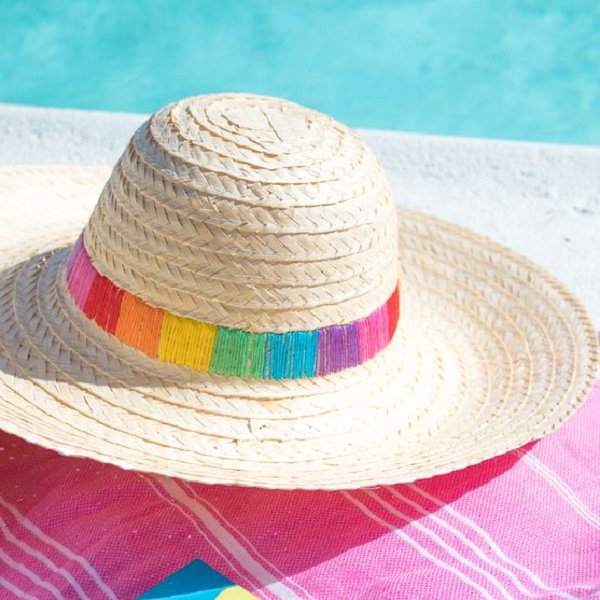
Wide-Brimmed Straw Hat
Chic and sophisticated, ideal for a summer wedding or a day at the races.
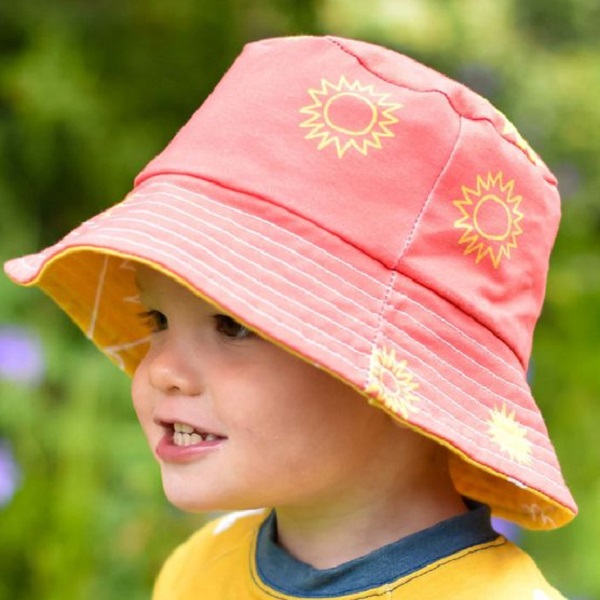
Bucket Hat
Trendy and casual, perfect for everyday wear.
Visor
Sporty and practical, great for outdoor activities.
Cloche Hat
Vintage-inspired and elegant, perfect for a special occasion.
Embellish Your Hat: Make It Your Own
Let your personality shine through with creative embellishments.
- Ribbons: Tie a ribbon around the crown of your hat for a touch of whimsy.
- Flowers: Sew or glue on fabric flowers for a feminine touch.
- Buttons: Add a cluster of colorful buttons for a playful look.
- Feathers: Attach a feather or two for a boho-chic vibe.
- Patches or Appliqués: Show off your interests with fun patches or appliqués.
Caring for Your Homemade Hat
To keep your hat looking its best, follow these care tips:
- Spot Clean: Gently remove stains with a damp cloth and mild soap.
- Avoid Water: Don’t soak your hat or get it overly wet, as this can damage the fabric or shape.
- Store Carefully: When not in use, store your hat in a cool, dry place away from direct sunlight.
Now that you’ve created your own unique summer hat, it’s time to show it off! Wear it with confidence and let your personality shine.
No Sewing Machine? No Problem! No-Sew Hat Options
Don’t worry if you’re not a sewing whiz. You can still create fabulous summer hats without touching a needle and thread. Here are two no-sew options:
- Upcycled T-Shirt Hat: Grab an old t-shirt and transform it into a trendy bucket hat. This method involves cutting, knotting, and a bit of clever folding. It’s a great way to give new life to an old garment and create a stylish accessory.
- Paper Straw Hat: Get crafty with paper straws and create a whimsical hat that’s perfect for a beach party or a music festival. This project requires some hot glue and a bit of patience, but the result is a fun and eye-catching hat that’s sure to turn heads.
Just like with sewn hats, you can personalize your no-sew creations with all sorts of embellishments. Get creative with fabric paint, markers, glitter, and anything else that sparks your imagination.
Beyond the Basics: Advanced Hat-Making Techniques
If you’re ready to take your hat-making skills to the next level, consider experimenting with these techniques:
- Blocking: This technique involves shaping your hat over a mold to create a specific style or design. It’s often used with straw hats to achieve a structured look.
- Dying: If you can’t find the perfect fabric color, try dyeing your fabric to achieve the desired shade. This opens up a whole new world of possibilities for customizing your hat.
- Adding a Lining: Lining your hat adds a layer of comfort and can help protect your head from the sun. It also provides an opportunity to incorporate another fabric pattern or color.
Hat Care Tips: Keeping Your Creation Looking Fresh
Proper care will ensure your handmade hat stays in tip-top shape:
- Spot Clean: Address stains promptly with a damp cloth and mild soap.
- Air Dry: Avoid using a dryer, as the heat can damage the fabric or structure.
- Reshape: If your hat loses its shape, gently reshape it with your hands or use steam to soften the fibers.
- Store Properly: Keep your hat in a cool, dry place away from direct sunlight to prevent fading.
Creating your own summer hat is more than just a craft project; it’s a way to express your creativity and individuality. Whether you’re a beginner or an experienced seamstress, hat-making offers a unique opportunity to learn new skills and create beautiful accessories that you’ll cherish for years to come.

Upcycling for a Sustainable Summer Hat
Looking for an eco-conscious way to craft your summer hat? Upcycling is the answer! Repurpose old fabrics or garments for a unique and sustainable accessory:
- Scarves: Transform a large scarf into a chic headscarf or turban.
- Bandanas: Fold and tie a bandana for a classic cowboy-inspired look.
- Tablecloths or Curtains: Use leftover fabric to create a wide-brimmed sun hat with a vintage feel.
- Denim: Give new life to old jeans by fashioning them into a trendy bucket hat.
Embracing Imperfections: The Charm of Handmade
Remember, crafting your own summer hat is about expressing your creativity and embracing imperfections. Don’t worry if your stitches aren’t perfectly straight or your brim isn’t perfectly symmetrical. These little quirks add character and charm to your creation. Involve your kids in the hat-making process for a fun and educational activity. Let them choose fabrics, patterns, and embellishments. They’ll be proud to wear a hat they helped create, and it’s a great way to encourage creativity and fine motor skills.
When making hats for children, prioritize sun protection. Choose fabrics with a high UPF rating to shield their delicate skin from harmful UV rays. Consider adding a wider brim or a neck flap for extra coverage. A handmade hat makes a thoughtful and unique gift. Whether it’s for a birthday, a holiday, or just because, your loved ones will appreciate the time and effort you put into creating a personalized accessory.