Top hats are iconic accessories, adding a touch of elegance and theatricality to any outfit. Whether you’re dressing up for a costume party or want to add a touch of flair to your everyday look, a DIY top hat is a fun and rewarding project.
In this guide, we’ll walk you through the steps of creating your very own top hats, using simple materials and tools you can find around the house or at a local craft store.
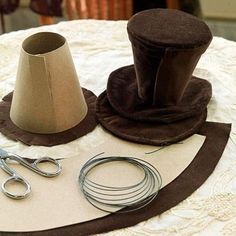
Gathering Your Supplies
Before you start crafting, gather the following materials:
- Cardboard (recycled cardboard boxes work well!)
- Fabric (felt, upholstery fabric, or even canvas can be used)
- Scissors
- Ruler
- Pencil
- Craft glue
- Hot glue gun (optional, for a stronger hold)
- Ribbon (optional, for decoration)
- Elastic band (optional, to secure the hat)
Crafting the Top Hat Base
The first step is creating the base of your top hats.
- Cardboard is a great material for the hat base because it’s sturdy and easy to cut.
- Measure the circumference of your head to determine the base size. You want the base to fit comfortably on your head without being too loose or too tight.
Here’s a general guideline for cutting the cardboard base:
-
Cut a long rectangle of cardboard. The length will be the circumference of your head, plus an extra 1 inch (2.54 cm) for seam allowance.
-
The height of the rectangle will determine the height of your top hat crown. A standard top hat crown is about 3-4 inches (7.62-10.16 cm) tall.
-
Once you have your rectangle, cut two circles out of cardboard. These will be the top and brim of your hat.
Tip: You can use a plate or bowl to trace a perfect circle onto the cardboard.
Shaping the Top Hat
Now that you have your base pieces cut out, it’s time to shape the top hats:
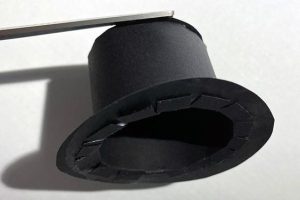
- Curving the brim: Carefully cut notches around the outer edge of the brim circle, at about 1-inch (2.54 cm) intervals. These notches will allow you to bend the brim downwards to create the classic hat shape.
- Forming the crown: Take the long rectangle and carefully bend it into a cylinder shape, overlapping the ends by 1 inch (2.54 cm) and gluing or taping them together to form the hat crown.
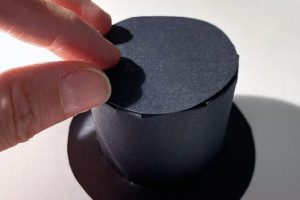
Attaching the Pieces
Once you have the curved brim and the crown formed, it’s time to attach them to create the complete hat structure:
- Apply craft glue to the top edge of the crown cylinder.
- Carefully position the brim circle on top of the crown, aligning the edges.
- Press the brim down gently to adhere it to the crown. You can use clips or binder clamps to hold the pieces together while the glue dries.
Adding Fabric for Style
The cardboard hat base is complete! Now, you can add fabric to give your top hats a polished look.
- Cut out fabric pieces slightly larger than each hat section (brim, crown, and sides).
- Apply craft glue to the cardboard hat base and carefully smooth the fabric onto the glued surfaces.
- Wrap the excess fabric around the bottom edge of the brim and glue it down to create a clean finish.
Tip: Use a hot glue gun for a stronger hold, especially when attaching fabric to the curved brim.
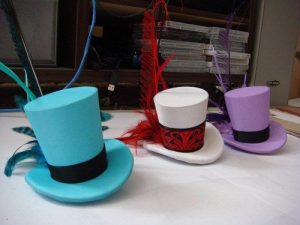
Customizing Your Top Hat
With the basic structure complete, you can now customize your top hats to reflect your style! Here are some ideas:
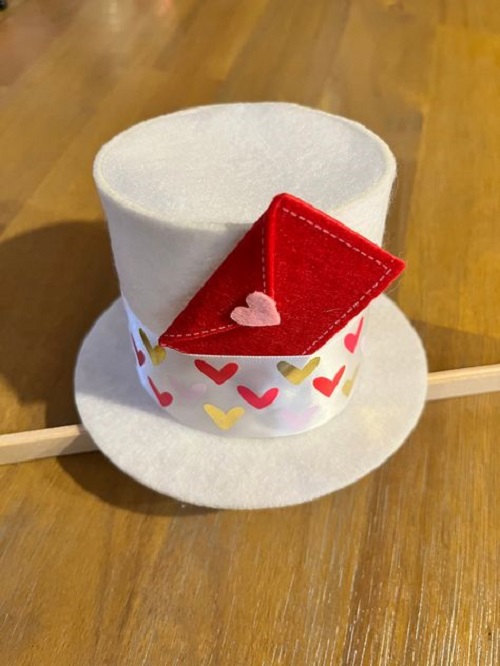
Ribbon:
Wrap a ribbon around the base of the crown and secure it with glue for a classic touch.
Trims and embellishments:
Add feathers, buttons, or other trims to personalize your hats.
Painted designs:
Use fabric paint to create designs or patterns on the hat.
Securing the Fit (Optional)
For a secure fit, you can add an elastic band to the inner bottom of the hat.
- Measure the circumference of your head and cut a length of elastic a few inches smaller.
- Attach the elastic band to the inner rim of the hat using hot glue or by sewing it in place.
Your one-of-a-kind top hat is complete! Stand tall and wear your creation with confidence.
This DIY top hats is a great way to express your creativity and add a touch of fun to any outfit.
Top Hat Tips and Tricks
Here are some additional tips to make your top hats crafting experience fun and successful:
- Sharp tools are key! Use sharp scissors and a craft knife to make clean cuts in your cardboard and fabric.
- Measure twice, cut once. Take your time measuring to ensure all your hat pieces fit together properly.
- Don’t be afraid to experiment! The beauty of DIY projects is that there are no mistakes, just unique creations.
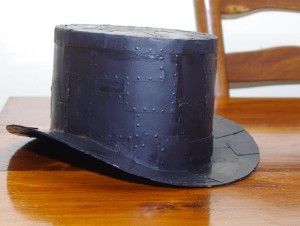
Displaying Your Top Hat Creation
When you’ve finished crafting your top hats, don’t just tuck it away! Here are some ideas for displaying your creation:
- Hat stand: A classic hat stand is a great way to showcase your top hat on a dresser or shelf.
- Wall mount: Create a wall mount specifically for your top hats using decorative hooks or brackets.
- Part of a costume: Top hats are fantastic costume accessories! Use your DIY top hats to complete a historical, theatrical, or whimsical costume.
Building a Top Hat: The Finishing Touches
We explored creating a basic top hat structure and adding fabric for a polished look. Now, let’s focus on some additional refinements:
-
Hat Lining (Optional): For a more professional look, you can add a lining made from fabric scraps or leftover felt. Cut a circle of lining fabric a bit smaller than the brim. Apply glue to the crown’s inner top edge and carefully attach the lining fabric. Press gently to smooth out any wrinkles.
-
Hatband (Optional): A hatband is a decorative strip around the crown’s base. Cut a long fabric strip, fold it in half lengthwise, and apply glue along one edge. Secure it around the crown’s base. You can embellish the hatband with ribbon or other trimmings.
Conclusion
Crafting your top hat is a fun and rewarding project. With a little creativity and these helpful tips, you can create a unique and stylish hat that reflects your personality. So grab your materials, unleash your creativity, and get ready to craft something amazing!